The second week of the month means a colour challenge at the 52 Christmas Card Challenge.
This time, it's grey, soft blue, soft green.
For this one I took my starting point from a card Sam Crowe showed at the Clarity Open Day in June. The front was cut narrower than the back, and the pattern from the front carried onto a strip of the back/inside. She also used the shape stamps, which are firmly on my wishlist. I had a first run at this style with a birthday card I made this week, which I'll blog at some point.
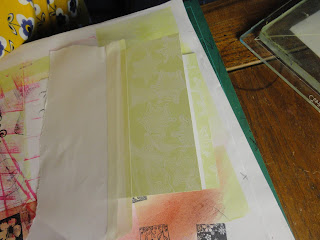
I started with a 6x6 card base, and trimmed back the front. I then masked off the left of the front.
Out came the gelli plate. I wanted to use a technique derived from something Barbara Gray demo'd on the telly last week, using the petite gel plates. I only have the very big one, but I can adapt!
Firstly, I spread green distress ink on half of the gel plate with the brayer. I used mainly bundled sage, with a touch of crushed olive to soften it a bit. I then stamped the Clarity snowflake stamps into the plate, to lift the ink off. Turns out, it's pretty difficult to see where you've been, especially if your plate is a bit mucky. Next time I'll stamp onto paper first, and put that under the gel plate to give me a guide.
I then pressed the inky plate onto the exposed card, transferring the ink, with voids where I'd stamped.
It's not perfect, but that's okay, it's a slightly grungy look I'm going for. Life is definitely much more straight forward with techniques that give you a bit of wiggle room, life's too short to be exact all the time.
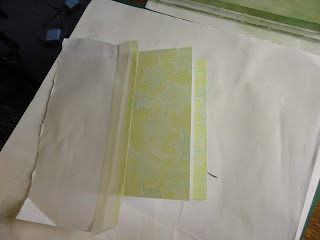
Next I cleaned the gel plate and spread the blue on - tumbled glass, with a touch of salty ocean. I pressed the stamps into the plate again, but this time used the ink I picked up to stamp into the voids on the card, matching up each snowflake. Again, it doesn't need to line up perfectly.
I have to say, I am really pleased with the way this looks.
And without the mask. Snowflakes work well for this, but you could use flowers or leaves, so many other stamps, even words, and of course, any colours you fancy.
Edit: Actually not words! As the print from the gelli plate is reversed, you need to use stamps that are more or less symmetrical.
At this point I forgot to take more progress photos!
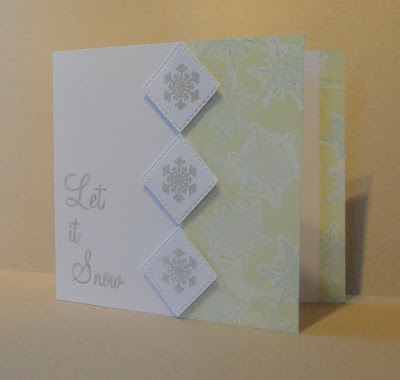
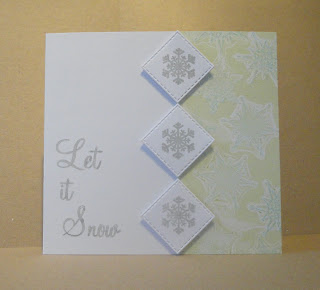
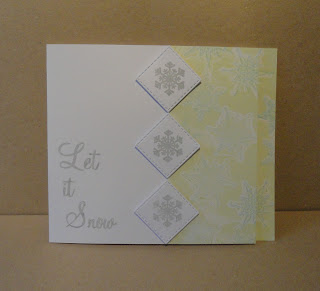
I cut 3 squares of white card, using my new Crealies double stitch square die set (bought for another project this month, but pressed into service for this card too). Using sky grey versa color ink, I stamped a smaller Clarity snowflake into the centre of each. I was going to heat emboss with clear powder but the ink had a nice pearl finish so I left it without. I mounted the squares as diamonds along the border of the coloured area, on foam pads. I trimmed the bottom of the card so they fitted exactly. I like the contrast between the messy, grungy pattern and the crispness of the border.
Finally, I used the same grey ink to stamp the "Let it Snow" sentiment to the left of the card.
This shows the pattern well, although you can't see the strip that carries onto the back section of the card.
The pattern reminds me of wallpaper somehow.
Soft colours used to create a soft, gentle looking card. I don't usually use grey (I had to buy the grey ink especially for this card) but I'm won over by the gentle effect. I guess watering can archival ink is next on my shopping list.



Wow Lucinda - your card is stunning! The background you created is beautiful. Thank you for the step by step guide - I'd love to try this technique. Thanks for joining us at 52 Christmas Card Throwdown. Gill, DT.
ReplyDeleteHi Gill, thanks so much. I'm really pleased with the background, I can't wait to have another play with different combinations. I love finding techniques that look great, and complicated, but are actually nice and easy x
DeleteLove it! It's clean and simple, it's elegant and it has a slightly grunge effect in the panel. I think it's a technique I need to try too! Great work. Thanks so much for playing along with 52CCT this week! Deborah, DT.
ReplyDeleteThank you Deborah. I don't usually thing of grunge for Christmas cards, but I've seen a few stunning cards recently, and why not? And with colours like this, slightly grungy can also be pretty!
DeleteThis is such a lovely card! You used our colors perfectly :)
ReplyDeleteThanks for joinig us at 52CCT :)
Thanks Kaja, I love these colours, and I wouldn't have chosen them myself, so thanks for the inspiration. It's great when these challenges push me to try something different.
DeleteLove this! Such a great way of combining stamps with the gelli plate. Thanks for joining us at 52CCT, April x
ReplyDeleteThank you April. Love a reason to get the gelli plate out!
DeleteA truly beautiful card. A very deserved win.
ReplyDeleteThank you Carolyn, that's very kind of you to say.
DeleteA truly beautiful card. A very deserved win.
ReplyDelete