 This card was made for the 52 Christmas Card Throwdown Challenge - I saw the theme of blue or purple plus a metallic, and had an idea for a gelli plate card. It didn't quite work out as I'd originally envisaged, I've not really got to grips with the gelli plate yet, but I like where it ended up nevertheless.
I started out making some gelli backgrounds with cobalt blue acrylic paint. For the first I used crumpled paper to give texture, then I noticed the pattern on my paper towel and gave that a go. It worked well, although on the first attempt I removed a lot of the pattern from the centre when I applied the second coat of paint to pull the print.
There was more white showing through than I wanted. I tried blending antique linen distress ink over, to soften the white, but it was a bit blotchy. If I was doing it again I think I'd apply it before pulling the print.
Next out with the leafy swirl stencil from Clarity Stamp. (I love this stencil, I could use it in most projects. Although it's not explicitly Christmassy, I think with the right colours it does have a Christmas feel.)
I used a gold pigment ink pad, and applied it to one of the prints through the stencil. That was just for the stash though, as the point was to cover the stencil in ink, which I then embossed onto another print using the Grand Calibur.
The colour was very subtle - in other words, didn't really show. So I added gold mica powder to both prints, which brought out the pattern a lot more. You can see the negative in the picture above.
The positive, embossed pattern has a shadow as the stencil obviously moved when I put it through the machine in both directions. Fortunately it looks like it might just be deliberate!
This is where I changed my plan and went for a circular design. So, I cut a circle from my embossed piece using a tonic die.
At the right angle you can really see the shine from the mica.
Next I dug out some gold mirror card and cut a ring the same size, as well as a smaller ring and two baubles from the Spellbinders Shapeabilities 2012 Holiday Tree die set. I managed to cut the smaller pieces from the centre of the larger ring to avoid waste.
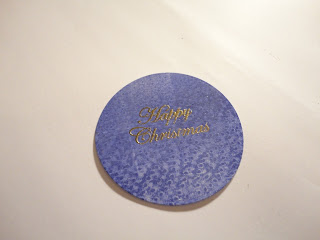
Time for the sentiment. I cut a smaller circle from the print I'd embossed, but an area that hadn't been covered by the stencil. I stamped "Happy Christmas" using watermark ink, then heat embossed in gold. I also heat embossed chains on the bigger circle for the baubles to hang from.
Time to assemble the pieces. I was going to use a 6" x 6" white card base, but I remembered I'd seen someone on TV talking about framing your cards for more impact, so decided to take their advice and go larger (to just under 8" x 8"). I made a matching matt by painting white card with the cobalt blue paint I'd used for the print.
Then it was just a matter of glue and tape, and here's the finished card.

I struggled with photographing this to show the shine but avoid glare. I must try to do a card without mica and metallics next time to make my life a bit easier!
As well as the 52 Christmas Card Throwdown Challenge, I have entered this for the C.R.A.F.T. Challenge 53 - Christmas, Crafting With An Attitude Challenge 8 and Crafty Girls Creations Challenge 6.


Wow, such a beautiful, elegant card. I love your background! Thanks for sharing with us at CRAFT Challenge! Brenda
ReplyDeleteThank you Brenda. I've by no means mastered the gelli plate, but fortunately it's very forgiving so even the "not quite rights" can be beautiful. And mica shine improves most things!
DeleteFantastic! Wonderful print-making and it was fascinating to read about the process. You have inspired me to get my gelli plate out! Thank you for sharing your lovely card with us at 52CCT, April x
ReplyDeleteThank you April, have fun with your gelli plate!
DeleteWow! This is fabulous. I love the gold swirly pattern and the die cut frame and ornaments. Very elegant. Thanks so much for playing along with 52CCT this week! BTW - super tutorial too!
ReplyDeleteThanks Deborah. I'm going to try to join 52CCT for the rest of the year - I'm very behind on my Christmas cards!
DeleteVery elegant card and lovely colors! Thanks for playing with us at Crafting with an Attitude :) xx Mari
ReplyDeleteThank you Mari
DeleteGreat card - thanks for joining at the Crafty Girls Challenge.
ReplyDeleteHelen x
Thank you Helen.
DeleteA great card - thanks for joining us at the CRAFT Challenge.
ReplyDeleteHelen x