Saturday, 22 June 2019
A snow flurry surprise
Fabiola's last challenge as June's host for the 52 Christmas Card Throwdown is:
I usually stick to flat cards for Christmas, for posting and also for ease of display amongst others for the recipient. But happy to try something different!
I have a book on pop up cards that I got from a charity shop ages ago, so I pulled it off the shelf and had a read through it in bed the other night, looking for inspiration (and instructions!).
There are some amazing designs and mechanisms, but I wanted to keep it simple for my own sanity!
I did actually do a dry run for this - and just as well as the first go I got myself in a right muddle, But it did clarify in my mind what I was doing, and the second was a lot better.
Then I was ready to tackle the real thing (albeit with a few changes to the dimensions to ensure the pop ups stayed within the card borders).
I wanted to create a snowflake flurry. I had in mind a page from a pop up Christmas book my daughter has - although that is a hugely complicated mechanism I wouldn't try to replicate.
Instead, I pulled out the snowflake swirl die from Leonie Pujol - this is fast becoming a staple - and her Snow die to match. I cut these from centura pearl card.
For the body of the pop up, I took a sheet of Sheena's stamping card, and sponged over distress oxides in shades of blue and purple. I flicked water over it, waited a bit then blotted, to give a snowy look.
It maybe looks more celestial than snowy - especially as the colours are a bit distorted in the photo, it is more blue!
I cut this to size then measured up and marked on the back for my layers, and cut and scored my lines.
Fortunately it worked!
I added a bit of stamping, heat embossed in white.
I then stuck my die cuts onto the pop out sections - I cut a few more for the top and bottom, trimming the swirl where needed for the fit.
I then realised that I needed to decorate the outside of the card as well! I didn't want it to detract from or compete with the inside, so kept it simple.
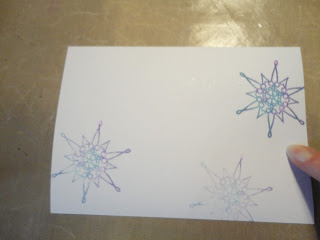
I cut another piece of the card to size, spritzed with water, then stamped snowflakes (from ClarityStamp) using the same distress oxide colours as the inside, mixing them on the stamp. I used first, second and third generation stamping. The water on the card helped it to merge and to get the third generation print.
I glued the pop out section into the card blank, to give myself wiggle time. I did one side, then once positioned, I applied glue to the other and closed the card onto it to get the right position.
The front I attached with super sticky tape, as it was warped slightly from the water.
So this is the outside - pretty but modest.
And it opens to reveal - my snow scene.
In real life there's more movement between the layers, and you can see the slight sparkle and sheen on the die cuts.
I am delighted with how well the pop out has worked, it's really square and sturdy. All that measuring was worth it!
I may be converted to pop ups - for some special people. They do take a bit of time, especially as you have to decorate the inside and outside, although I think having done this one the next would be quicker. I had another idea for a design when planning this, which may end up under the tree with hubby's name on this Christmas!
So, if you fancy having a play, do pop over to 52CCT and share your card. You have until Friday 5th July to enter - two weeks this time as there are 5 Saturdays in June, so plenty of time to experiment. Have fun!
Subscribe to:
Post Comments (Atom)


quelle jolie tempête de neige Lucinda, j'adore, c'est une magnifique idée, biz
ReplyDeleteMerci Fabiola x
Delete