Pages

Showing posts with label stencil. Show all posts

Saturday, 14 May 2022

Christmas Fairy


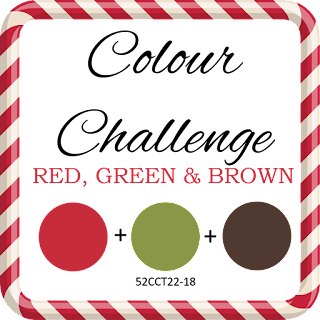
Tracy's colour selection at 52 Christmas Card Throwdown is festive through and through!


I got this stamp set years ago, and have wanted to colour this image, so this seemed a good opportunity.

The inital layers are watercolour, a mixture of distress inks and markers, and pergaliner markers. But the image was a little detailed for watercolour, so I went back in with my polychromo pencils.

The background frame is stencilled in bundled sage distress ink, and both pieces are edged with red sharpie.


It's not great, but it was relaxing to do, and it's all practice.


 To play along, pop over to the 52CCT blog, check out the great inspiration from the design team, and enter your own card.

This challenge closes on Friday 20th May.

Saturday, 9 April 2022

Frosty snowflakes


Goga is our host at 52 Christmas Card Throwdown this month, and she has chosen a lovely frosty set of colours for us to play with.


I had to go with snowflakes for these!

I made my backgroundwith distress oxides (mainly stormy sky, with a bit of faded jeans and chipped sapphire) and a silver pigment ink. I haven't used pigment ink for a while, I had to use washing up liquid to clean the sticky off my stamps!

A mixture of stamps and stencils built up the pattern. I love doing these, it's such fun to put things together.

I die cut the large snowflake from centura pearl card. The sentiment was die cut from a scrap, stamped in the pigment ink and edged with stormy sky. Then it and the background were edged in cornflower blue archival ink.


Impossible to photograph the shimmer on the die cut or silver ink, and the photo also loses some of the drama. But hopefully you can see the prettiness!


The challenge is open until Friday 15th April - pop on over to the 52CCT blog to see all the Design Team inspiration, and to share your card with us.

Saturday, 8 January 2022

Moonlight deer


Happy New Year!!

It's good to be back with the 52 Christmas Card Throwdown in 2022.

A slightly slow start due to covid visiting us over Christmas, and still making itself felt, but here's my first card, using the sketch Andreja L has set for the week.


I have rotated the sketch for my card.

The moon was made with an outer mask then a small gel plate with grey ink, splattered with water. I love the way this turned out!

The sky uses a Lavinia stencil and stormy sky oxide ink (both Christmas presents!). The mask inner was used.

The background trees are a Clarity mask, with iced spruce, bundled sage and old paper oxides.

I overstamped with archival inks and Lavinia stamps.

The die cuts are Tim Holtz (the tree) and Tattered Lace (the deer). I smooshed oxide onto them to colour them.

The sentiment is from an old set, stamped in archival, blue then grey the black at the bottom (using a stamping platform).

And black soot oxide blended round the edge, then black archival swiped on the edges, to frame.


This is what I think of as a very Lavinia style card, despite using a range of products. Lots of depth from the layers. It's good to be off the mark!


To join in, visit us on the 52CCT blog. You'll be able to see the rest of the design team inspiration, and share your card with us. You have until Friday 14th January to enter.

Saturday, 13 November 2021

Alcohol ink baubles


Gill is our host at the 52 Christmas Card Throwdown for the month, and has set a colour challenge for us:


I got ahead for this one, during a workshop earlier in the year using alcohol inks on a gel plate, with stencils.


The two on the left are from the gelplate, applied through the stencil (from Clarity) then lifted with white acrylic. The ones on the right are then cleaning off the stencil, with IPA.

I used top right and bottom left.


I didn't muck around with these at all. I simply cut a section to fit the side of a 6x6 card blank and edged with black pen. I stamped the sentiment in black archival, and added dots with a black pen.


A simple layout to allow the alcohol ink designs to shine.


The two techniques give different effects - the first is brighter and cleaner, but I really love this more grungy look.


To play along come and visit us at 52CCT.

This challenge is open for a week, to Friday 19th November.

Have fun!


Saturday, 28 August 2021

Oh, so pretty


For her last week as host of the 52 Christmas Card Throwdown, Jenny has chosen a fabulous stash challenge - Stencil.


So many options for what to do with this one! I went for something very simple, and I hope it doesn't sound boastful if I say I think it's turned out beautifully!

I used two frame stencils, from That Special Touch. I placed them at an angle on my card, to form a curve, then brushed distress ink over them. I used bundled sage on the holly one and tumbled glass on the snowflakes. Light colours as this is a base layer to give definition.


With the stencil still in place, I spritzed water onto the card in the same area, then removed the stencil. I sprinkled on brushos and left them to react in the water and dry. I used leaf green for the holly, and ultramarine with a touch of turquoise for the snowflakes.


Once they were completely dry, I could tap off the brusho in the dry areas that hadn't reacted.

The sentiments were stamped onto offcuts of the backgrounds from when I cut them to size. I used archival ink, in fern green and watering can. I edged the sentiment and base with the inks too.


Very simple, but oh, so pretty! For once, it's not the snowflakes that have won me over, my favourite is the holly.


 But the snowflakes are gorgeous too.

To play along, visit us at the 52CCT blog, where you'll also find all the inspiration from my design team colleagues. This challenge is open for a week, until Friday 3rd September. Have fun, I really look forward to seeing what amazing cards we receive!

Saturday, 10 July 2021

Alcohol and gelli


This week on the 52 Christmas Card Throwdown, Andreja has set us a colour challenge.


Last weekend I did an online workshop with Angela, using alcohol inks with the gel plate and stencils. I came away with a huge stash of gorgeous backgrounds, not least because I kept going after she finished, there was just one more stencil to try, one more mop up, one more idea....

Some of them I made with this challenge in mind, using Clarity Christmas aperture stencils.


I've made two of these into cards, the rest are waiting (along with so much else) for another day!


For this one, I dabbed purple twilight and aubergine ink through the stencil onto the gel plate, then pressed bubble wrap into it. Once the ink was dry, I brayered white acrylic paint over the plate and pulled my print. There was yellow ink residue on the plate, which wouldn't clean off, which has given the background a pale golden glow.

I cut the print to size, using a scrap from the side for the gold embossed sentiment. I edged with a gold sharpie, then doodled on the star, tree and border with a gold gel pen. I do like the bubble wrap baubles.


This card is the "waste" from the technique used above. With IPA on my felt, I swiped the excess ink from the stencil onto a clean piece of card. I then pressed the bubble wrap in - I think it would have had purple ink on to start with (from another print) then I spritzed it with the IPA and pressed, for the subtle impression.

The background of this one was therefore clean white card at the start.

I replaced the stencil and used an embossing pen over the cap area, then embossed in gold. I also embossed a border (after cutting to size).

I placed the "innie" stencil over the bauble, along with a piece of card to protect the loop, then used gold pigment ink to stamp the script in the background. I also sponged this ink round the edge to give the aged, vintage feel.

On the bauble, I stamped the sleigh and heat embossed in white. I added the stars/snow and line with a posca pen, then the larger star, again embossed.

The final touch is a slight drop shadow with light and dark grey polychromo pencils, to give the bauble some depth.


The paint pull on this gives a grungy feel that the photo doesn't capture. I like the looseness and imperfectness of this image.


This one has taken a grungy feel I didn't anticipate from the starting print. Blending the ink around the egde softened the script print, which I over did a bit, and gave a balance. The sleigh stamp is so pretty and delicate, even when embossed.This was overlooked in my stash for a long time, I'm glad I've "discovered" it now.


To join in and share your ideas for using these colours, head over to the 52CCT blog, where you'll find all the inspiration from my design team colleagues.

The challenge is open for a week, to Friday 16th July.

Have fun!

Saturday, 28 November 2020

Gilded CASE


Gill's final November challenge at 52 Christmas Card Throwdown, and our last "regular" challenge for 2020, is a stash challenge.


Gilding flakes or foiling is what we're looking for.

I CASEd one of my own cards from 2017 for this. I'd forgotten this technique until I looked back!

The base is champagne modelling cream, brayered over the card. I then stamped in brown over the background. I used adirondack ink initially, as below. In my previous post I said this dried fine - I must have left it for a while as this did not dry, even with a heat tool! So I started again and used archival ink. Presumably the first one will dry eventually and can be used.

Next I applied bronze modelling paste through a stencil, and added gilding flakes over it while wet. I had to be careful not to squish it.


And the same again with a stag head stencil.


When the paste dried, I wiped off the excess gilding flakes to reveal the stencil design, with random metallic flecks over the bronze.

For the sentiment I used an offcut of the card and embossed with copper powder. I wiped a little bronze paste around the edge. The mount has dark brown stazon ink added.


I cut the base to size, and sponged the archival brown around the edge. I then edged with the stazon dark brown for a stronger frame.


Quite a vintage look to this one, with a shabby chic vibe too. But the shine gives a bit of a festive, celebratory feel too.

I do like these layerd cards, built up from plain white piece of card!


To join in with our technique challenge and top up your card stash ahead of the main event, visit us at the 52CCT blog.

You have until Friday 4th December to play along.

Saturday, 19 September 2020

Polar bear and Penguin


Rosi is hosting the 52 Christmas Card Throwdown this month. For her theme, she's chosen polar bears and/or penguins.


I don't have that many character stamps, but do have dies of a polar bear and a penguin. So I decided to use these, against a mixed media background.

I started by going through my stash of backgrounds and pulling out some in blue/frosty colours. I tore these up and added to card that I'd cut to size for a 5x7 card. I also added parts of a page from an old dictionary - if you look carefully you can see definitions for polar and polar bear.

To pull the background together, I stencilled over with a dots stencil and white paint.

I wanted to unify it a bit more, so added a watercolour wash of blue. I used chipped sapphire distress ink, but it didn't go according to plan - I ended up dying the white areas pink!

This wasn't what I wanted at all!

Serendipity, or good timing, took a hand here. I have signed up for Wanderlust 2021, and was watching a bonus/pre-course video on backgrounds. One of the teachers showed a glazing technique using gel medium and acrylic paint. Which is what I used to rescue this. I mixed a very little bit of paint with medium, and applied over the pink areas, and elsewhere. Unlike glaxing medium, the gel doesn't self level, and I made a positive of this, creating texture with the palette knife.


I sponged the edge with midnight blue stazon ink.

I die cut the polar bear, penguin, some trees and a sentiment from white card. I also got out my stash of precut die cuts, and arranged on the card until I was happy with the layout, then glued.


I had a lot of fun building this one up. I like the collage part, I'm seeing that a lot at the moment, and tried a new technique with the glazing, which is always good. The contrast between the grungy background and crisp die cuts is pleasing to me.


To play along with the 52CCT this week, visit our blog. This challenge is open until Friday 25th September.

Saturday, 20 June 2020

Snowflake bonanza!


Becca has given me a gift of a theme challenge at the 52 Christmas Card Throwdown this week!


Given that I've had snowflakes on my last 3 cards, and probably on the majority of Christmas cards I make, this was an easy one! The biggest problem was how to narrow down what to do.

Having done a simple card last week, I decided to go more mixed media this time.

I pulled out adirondack inks, in denim and sandal, for a change. I started with two stencils, one positive and one negative.

I also used a word stamp from a very pretty snowflake set. It's not something I'd use as a sentiment on a card, but I love it for background in this context.

I couldn't decide whether to cut this down to 5x7 or 6x6, so hubby persuaded me to make a second and do both!


Spot the cat paws in the background - my little boy likes to sit close by when I'm crafting!

I took each of these in different directions.

The portrait one, I edged with the denim, and stamped some small snowflakes round for a frame.

I embossed opposite corners with a snowflake folder (I realised I have at least 4) and added bronze gilding wax.


I die cut a big snowflake and a little one, both Tim Holtz dies. I inked the little one in denim.


I also die cut two snowflake sprays, and inked one with denim and sandal, and added the gilding wax too.


I got a green tinge where the inks mixed, but I can live with it. It looks very verdegris!

I didn't want to add a sentiment, but felt it needed a little more focus. I stamped just "Snowflakes" from the word stamp onto an offcut of the background, to place among the swirls.

I arranged the diecuts onto the card, and mounted on a 5x7 blank.


I'm really happy with how this turned out - for once I resisted the urge to fill in every area so have managed to leave some relatively open space.


For the square background, I wanted to do something different.

I used a snowflake frame stencil around the outside. I inked the stencil in denim, then ran it through the embossing machine. While the stencil was still in place, I sponged white gesso over everything to knock it back .


I used a polychromo pencil to add colour to the stencil frame as it hadn't taken everywhere - and gesso had leaked under in places too.

I stamped a "Let it Snow" sentiment in the centre. I used the denim first, but it didn't take too well over the gesso. So I restamped with dark blue stazon. I lined up the stamp by hand as I'd taken it off the stamp platform in between, so it wasn't quite spot on, but looks like a drop shadow so I quite like it!

I edged in denim then the stazon, and used a white gel pen to bring out the sentiment more, and to add dots around the card for more detail.

This one went on a 6x6 card blank.


This frame is so pretty, I forgot I had it for ages and have been wanting to use it since I rediscovered it. For me this card has a delicate, snow flurry feel.


I've really enjoyed making two such different cards from one background.

Whether you have an obsessive number of snowflakes in your stash like me, or just a single stamp, have fun creating your own snowflakes Christmas card. You can share with us at 52CCT until Friday 26th June.