Pages

Showing posts with label bauble. Show all posts

Saturday, 13 August 2022

Framed Baubles


Valerie, our August host at 52 Christmas Card Throwdown, has chosen a very pretty colour combination. It's not traditionally festive, but nonetheless is opulent and has a Christmas vibe (to my eye!).


I made this card as part of an online workshop with Angela Simpson.

The two layer frame was die cut with square stitched nesting dies. The baubles and foliage were stamped and embossed, then coloured with distress oxides and a water pen. I fussy cut them out (not my favourite job!) then arranged them inside and outside the frame.


As always, gold is hard to photograph, this was the best I could do to show the shine.

The frame does give a strong structure to the card, such a neat technique.


So now, over to you. Do pop over to the 52CCT blog to see the rest of the design team cards for inspiration. The challenge is open until Friday 19th August.

Saturday, 28 May 2022

Triple round baubles


Tracy's final challenge as host of the 52 Christmas Card Throwdown is a technique.


I decided to change it up by using circles instead of rectangles. I have a nested set of dies with narrow increments, although the borders are still a little wider than usual I think.

I stamped the image, and embossed in black. For the colour I used pergaliner pens, and a waterpen. The background is coloured with bundled sage distress ink.

Finally, the sentiment is printed with a fun font.

I put the image onto a 5x5 card blank.


Bright and colourful, with a different twist!


To play along do head over to our blog 52CCT. The design team have some wonderful cards. You have until Friday 4th June to join in with this challenge.

Saturday, 12 March 2022

When Plan A doesn't work, go to Plan B!


It's time for my second challenge choice hosting the 52 Christmas Card Throwdown this month.

The second week is always a colour challenge. This one was a pure indulgence - I didn't think about colour wheels or anything, just chose three of my favourite colours to play with.


My plan was to use acrylic paint on the gel plate, with a Clarity bauble stencil. That was a bit of a fail! The images were blurred and unclear, so not usable as they were.

However, with the failed prints, and lift off sheets, and brayer cleaning sheets, I had a lot of "collage fodder" in the challenge colours. And so this card rose from the ashes!

For a focal point, I stamped an IndigiBlu bauble with mixed media embossing powder, the sentiment is in the same powder. Looking at the photo, the bauble looks a bit flat, I think I should have torn the piece down smaller (too late) or added shading or some background - which I could still do.

Once everything was stuck down (on a base from a bit of junk mail, gesso'd), I went round each piece with purple, teal or grey inktense pencils to highlight the shapes and add depth. I used the purple paint round the edge, then a black ink pad. And finally some doodling.

This is an A5 card, I felt the proprotions worked better than a 5x7.

I have lots of "fodder" left, and a purple embossed bauble and sentiment, so may make a second version. I also remembered I have lint cloth dyed in these colours, so could add those for a more mixed media feel.


Gorgeously grungy - not how I'd envisioned these colours at all, but that's how it goes sometimes.


I hope you have fun playing with these bright and funky colours. Do visit us at 52CCT to check out the design team talent, and share your card with us.

Saturday, 13 November 2021

Alcohol ink baubles


Gill is our host at the 52 Christmas Card Throwdown for the month, and has set a colour challenge for us:


I got ahead for this one, during a workshop earlier in the year using alcohol inks on a gel plate, with stencils.


The two on the left are from the gelplate, applied through the stencil (from Clarity) then lifted with white acrylic. The ones on the right are then cleaning off the stencil, with IPA.

I used top right and bottom left.


I didn't muck around with these at all. I simply cut a section to fit the side of a 6x6 card blank and edged with black pen. I stamped the sentiment in black archival, and added dots with a black pen.


A simple layout to allow the alcohol ink designs to shine.


The two techniques give different effects - the first is brighter and cleaner, but I really love this more grungy look.


To play along come and visit us at 52CCT.

This challenge is open for a week, to Friday 19th November.

Have fun!


Saturday, 23 October 2021

Pop-Up Baubles


I am here with Majda's final challenge for the month at 52 Christmas Card Throwdown - it's either stash or technique, and she has chosen "Pop-Up" cards.


My card is a twist out design. I learnt this at a workshop with Angela Simpson earlier in the year (online!). She used it with a lovely colouring technique - I was running late but was able to catch up as I used brushos instead! Much quicker!

I cut all my pieces, from watercolour card and black, then stamped and embossed. This is a lovely folksy bauble set. Then sprinkle on the brusho, spritz, and watch the magic! I think I used alizarin crimson, yellow and emerald green.

And next, construct the card - I won't try to explain how it goes together, but it's easy once you know how!!

And the final card goes into a C6 envelope - although it's quite thick, so not one to post!!

To play along, head over to the 52CCT blog. The challenge is open for TWO weeks (we have a break on the 5th Saturday of the month), so you have until Friday 5th November to enter.

Happy playing!

Saturday, 14 August 2021

Baublicious


Jenny has chosen an unusual but very pretty colour combination for us at 52 Christmas Card Throwdown this week.


It took a little while to think what I wanted to do for this, and a bit of serendipity played a part.

The background uses an embossing folder, I saw a youtube of someone using this technique, which I haven't done for ages, so decided to have a play.

I didn't have an ink that I would call aqua (there was a bit of a discussion at home about what colour aqua was, how much green is in it!). So I blended distress oxides, mostly peacock feathers, with a bit of tumbled glass and bundled sage sponged on. Cracked postacio may have been a better green to use, with hindsight. I added the ink to the deboss side of the folder, and spritzed the card with water before running through the embossing machine. I had a few iterations, this was the one I was happy with - although the photo is doesn't show the touch of green there is in real life!


(You can see I also used a spray over an embossed panel, but haven't made that into a card yet. The spray was also a blend, of distress reinker colours.)

I was going to do a gel plate paint print for the rose pink, but then on holiday last week I treated myself to some pink alcohol inks, and a gold mixative (amongst other crafty things!). So it seemed rude not to use them for this colour challenge.

I used these, again blending the pinks to get a shade I liked, to make a background sheet. I used yupo paper and coated card as bases, to compare.


I preferred the piece on coated paper, although that's not what I ended up using!

Onto these, I stamped my baubles in versamark ink, and heat embossed with a light gold powder. Of course, yupo paper is plastic so doesn't handle heat well - it curled up a lot!


However, once I'd fussy cut them out, I preferred them, they had more dimension, and the card ones looked flat in comparison. So those are the ones I used. And the rest have gone in an envelope to be used another time!

I arranged on the base, then stuck down with red linetape, to cope with the plastic surface, curl and embossed base.

At this point I realised I hadn't cut my base to size, it was slightly large (as is my usual practice, in case I don't like a bit or the edge pools or something). Fortunately, it was only slightly too large, because the baubles weren't coming off! I trimmed the base slightly, and made my card blank a bit bigger than usual, and it worked out.

I sponged peacock feathers around the edge, then added the bauble strings with a gel pen and ruler. The gold was a bit too yellow next to the embossing, so I used a little silver as well, while the ink was still wet, mixing them on the page to get a more subtle gold colour.


So, there you have my rose pink, aqua and gold card. Unfortunately the photo has distorted the colours a little, and the texture on the base and baubles looks a lot better in real life! But this is such a pretty colour combination, I hope you can get a feel for it.


To play along with this challenge, visit us at the 52CCT blog. You have a week, until Friday 20th August, to enter your card into our gallery.

Saturday, 7 August 2021

A sketch - or five


Jenny is our host for August at the 52 Christmas Card Throwdown. She has some great challenges lined up so I hope you'll be inspired to craft along and start, or build up, that Christmas card stash for the end of the year.

She has chosen a fun sketch for us.


As soon as I saw this, I thought of a bauble stamp I have. I was sure I'd blogged cards made with it before, but don't seen to have done so.

I got a bit carried away with this sketch so have a few cards to show you! Unfortunately the photos haven't come out particularly well.


This first is a CAS of a card I made for hubby last Christmas.


I stamped the image and embossed on black. I then added brushos, in alizarin crimson, yellow and emerald green, and spritzed with water.

Once dry, I used inktense pencils to bring out the baubles, and polychromo pencils to knock back the background in places, and add a drop shadow.

The sentiment is from Clarity's sticker sentiments.


For this one, I used the stamp platform and inked the stamp in distress oxides. I think I used aged mahogany, fossilised amber, and some green... can't remember which!

I spritzed the card and stamp with water before stamping, so the ink moved around. I repeated for more ink, then left to dry without taking the stamp out of the stamp platform.

Once the stamped image had dried, I over stamped with watering can grey archival ink. As the stamp hadn't been moved, it lined up perfectly. I am so happy with how this has come out!

The sentiment is stamped on a scrap of card with the same grey ink, which I've also used to edge the sentiment and card.


After the colour stamping for the card above, there was ink left on the stamp, so I stamped onto another piece of card, which I'd spritzed with water to activate the oxides. It gave a lovely soft print, although the ink didn't travel much.

I overstamped in the grey as above, but as there wasn't so much colour, I added in a watercoloured background with inktense. I liked the prettiness of the baubles so decided to colour the negative space. It's by no means great watercolouring but I'm still really pleased with this, it may be my favourite!

I put this onto a 5x5 card blank (the others are 6x6).


The other thought I had when looking at Jenny's sketch, which is inevitable for circles, was snowflakes!

I tried the same technique as above with the stamping platform and the bleeding ink. I did one with oxides and one with distress inks, to compare. There wasn't too much difference, and neither bled as much as I hoped. It may be the card I used for this one, although it is designed to take water, or maybe the stamps are too fine to hold enough ink.

I over stamped the snowflakes with versamark and heat embossed in white.

They looked quite lonely and plain on an expanse of white, and not in a good way! So I needed to add layers to these cards.

For the card above, I heat embossed the Merry Christmas at the bottom, then stamped the "Let it Snow" stamp in archival, with shades of blue and second, third and fourth generation. I then smooshed through blue inks on the mat. 

For the card below, I stamped the Let It Snow sentiment in archival cornflower blue, then heat embossed a lovely background word stamp over the rest of the card, masking the snowflakes and sentiments, before smooshing.


The snowflakes had sunk back a lot, so I sponged more oxide over these and the Merry Christmas sentiment, and spritzed with water, to make the embossing pop out.

I edged with blue and mounted on DL cards.

The photos of these are particularly bad, the camera hasn't coped with the mottled background! They are quite soft but pretty, with delicate detail that doesn't show in the photos.


So, there are my efforts using the sketch. I hope that, together with my design team collegues on the 52CCT blog, I have inspired you to play along.

This challenge is open for a week, until the 13th August.

Enjoy!!

Saturday, 10 April 2021

Silver, silver, silver


Branka's colour challenge at the 52 Christmas Card Throwdown this week is Silver and White.


My first thought was to make something delicate and pretty with silver embossing, and dry embossing on white. And I'm sure we'll have some beautiful cards like that. But I wasn't in that kind of mood, I wanted to make something more grungy.

I started with super smooth white watercolour paper, and silver mica powder. I wetted the paper, mixed the powder with water, and painted and splattered it onto the card.


I used the one on the right as my background, and the other for die cutting.

I cut the background down, and die cut a zig zag edge.


I then overstamped the background with silver pigment ink and a few different stamps. 


The right side was a bit plain/dark, so I stamped and heat embossed with silver powder.

From the other mica powder piece, I die cut a circle, and the Noel shape and some snowflakes. I stamped parts of the circle with the silver ink.

I heat embossed a spare piece of card with my sentiment, then painted the edges with mica powder.

To mount, I cut a piece of white card and edged with silver embossing powder.

There was a lot of fiddling and rearranging before I got to a composition I was happy with!


I'm really pleased with how this has turned out. I didn't know if I'd be able to get this much variety and interest just using silver, but I think that with the different products and techniques, I have.


I hope this has inspired you to play! To join in with your take on silver and white Christmas cards, pop over to the 52CCT blog. The challenge is open for a week, to Friday 16th April.

Saturday, 13 February 2021

Drippy colours


For my colour challenge at 52 Christmas Card Throwdown, I've chosen pink, purple and blue. Purple is my favourite colour, pink is my daughter's. I wanted colours next to each other on the colour wheel so I could play with messy colour techniques, mixing colours without worrying about creating other colours!


I had a session making a series of backgrounds with these colours and different media. I added the colours to the top of the watercolour card while holding it upright, then spritzed with water to get drips and runs down the page.


From the left, I used brushos, sprays, distress oxides, distress reinkers, then I have three mop up sheets, printing from the paper towel used to catch the run off and mop up from the craft map.

I used the pieces made from brushos, sprays and one of the mop ups.

In the Black Friday sales, I couldn't resist this frosty bauble stamp from IndigiBlu. I don't usualy go for stamps that make a card in themselves, preferring to have more input, but this was so pretty! And at the moment with home schooling, something quick was appreciated.

I stamped and embossed with silver powder, then cut the cards down to size (14x14cm for a 6x6 card blank).


To finish, I added sentiments, from ClarityStamp, also heat embossed in silver, and edged in silver as well.


This is the card made with spray inks. It's the darkest and most dramatic.


This uses a mop up piece, much more delicate and pretty.


This angle shows the stamp off better - the perennial problem of photographing shiny cards!!


And finally the brushos - I cut away the part of the card with the bursts that I usually love from brushos (although it's in the stash for another time!) so this has a much softer, dreamier feel, with shades of colour that I adore.


However you choose to play with these colours, please visit us at 52CCT to see the wonderful inspiration from the design team, and to share your card. The challenge is open for a week until Friday 19th February.

Saturday, 26 September 2020

Collage and bauble


Rosi's final challenge as host of the 52 Christmas Card Throwdown is a technique - Partial Stencilling.


She provides some video links on the 52CCT blog with demonstrations.

I still had my stash of backgrounds out from last week, so have made another collage card as a base for my stencilling. Going through the papers is quite fun, I often remember the projects that these were "waste" from!

I used text in the middle as a plainer base for the stencil, and patterns around.

I didn't cover the left-hand side as I intended to add a strip on this side, but changed my mind.

I then trimmed back to 14cm x 14xm - for a 6x6 card base.

 To knock back the colours, I dry brushed with white gesso.


To constrain my stencil - the "partial" element - I cut a bauble mask from copy paper. I used a stamp to create the shape then cut.


The stencil I used was a snowflake from Clarity, I didn't take any photos of it.

I used Clarity stencil brushes to add distress oxides - peacock feathers, with chipped sapphire around the edges.

The bauble hanger I drew in with a gold pen.

I went back and added more collage pieces to cover the left-hand side.

I cut it back...

... and gessoed.


Having done this, I decided it needed some of the text in the collage so added some snippets, and then gessoed them.

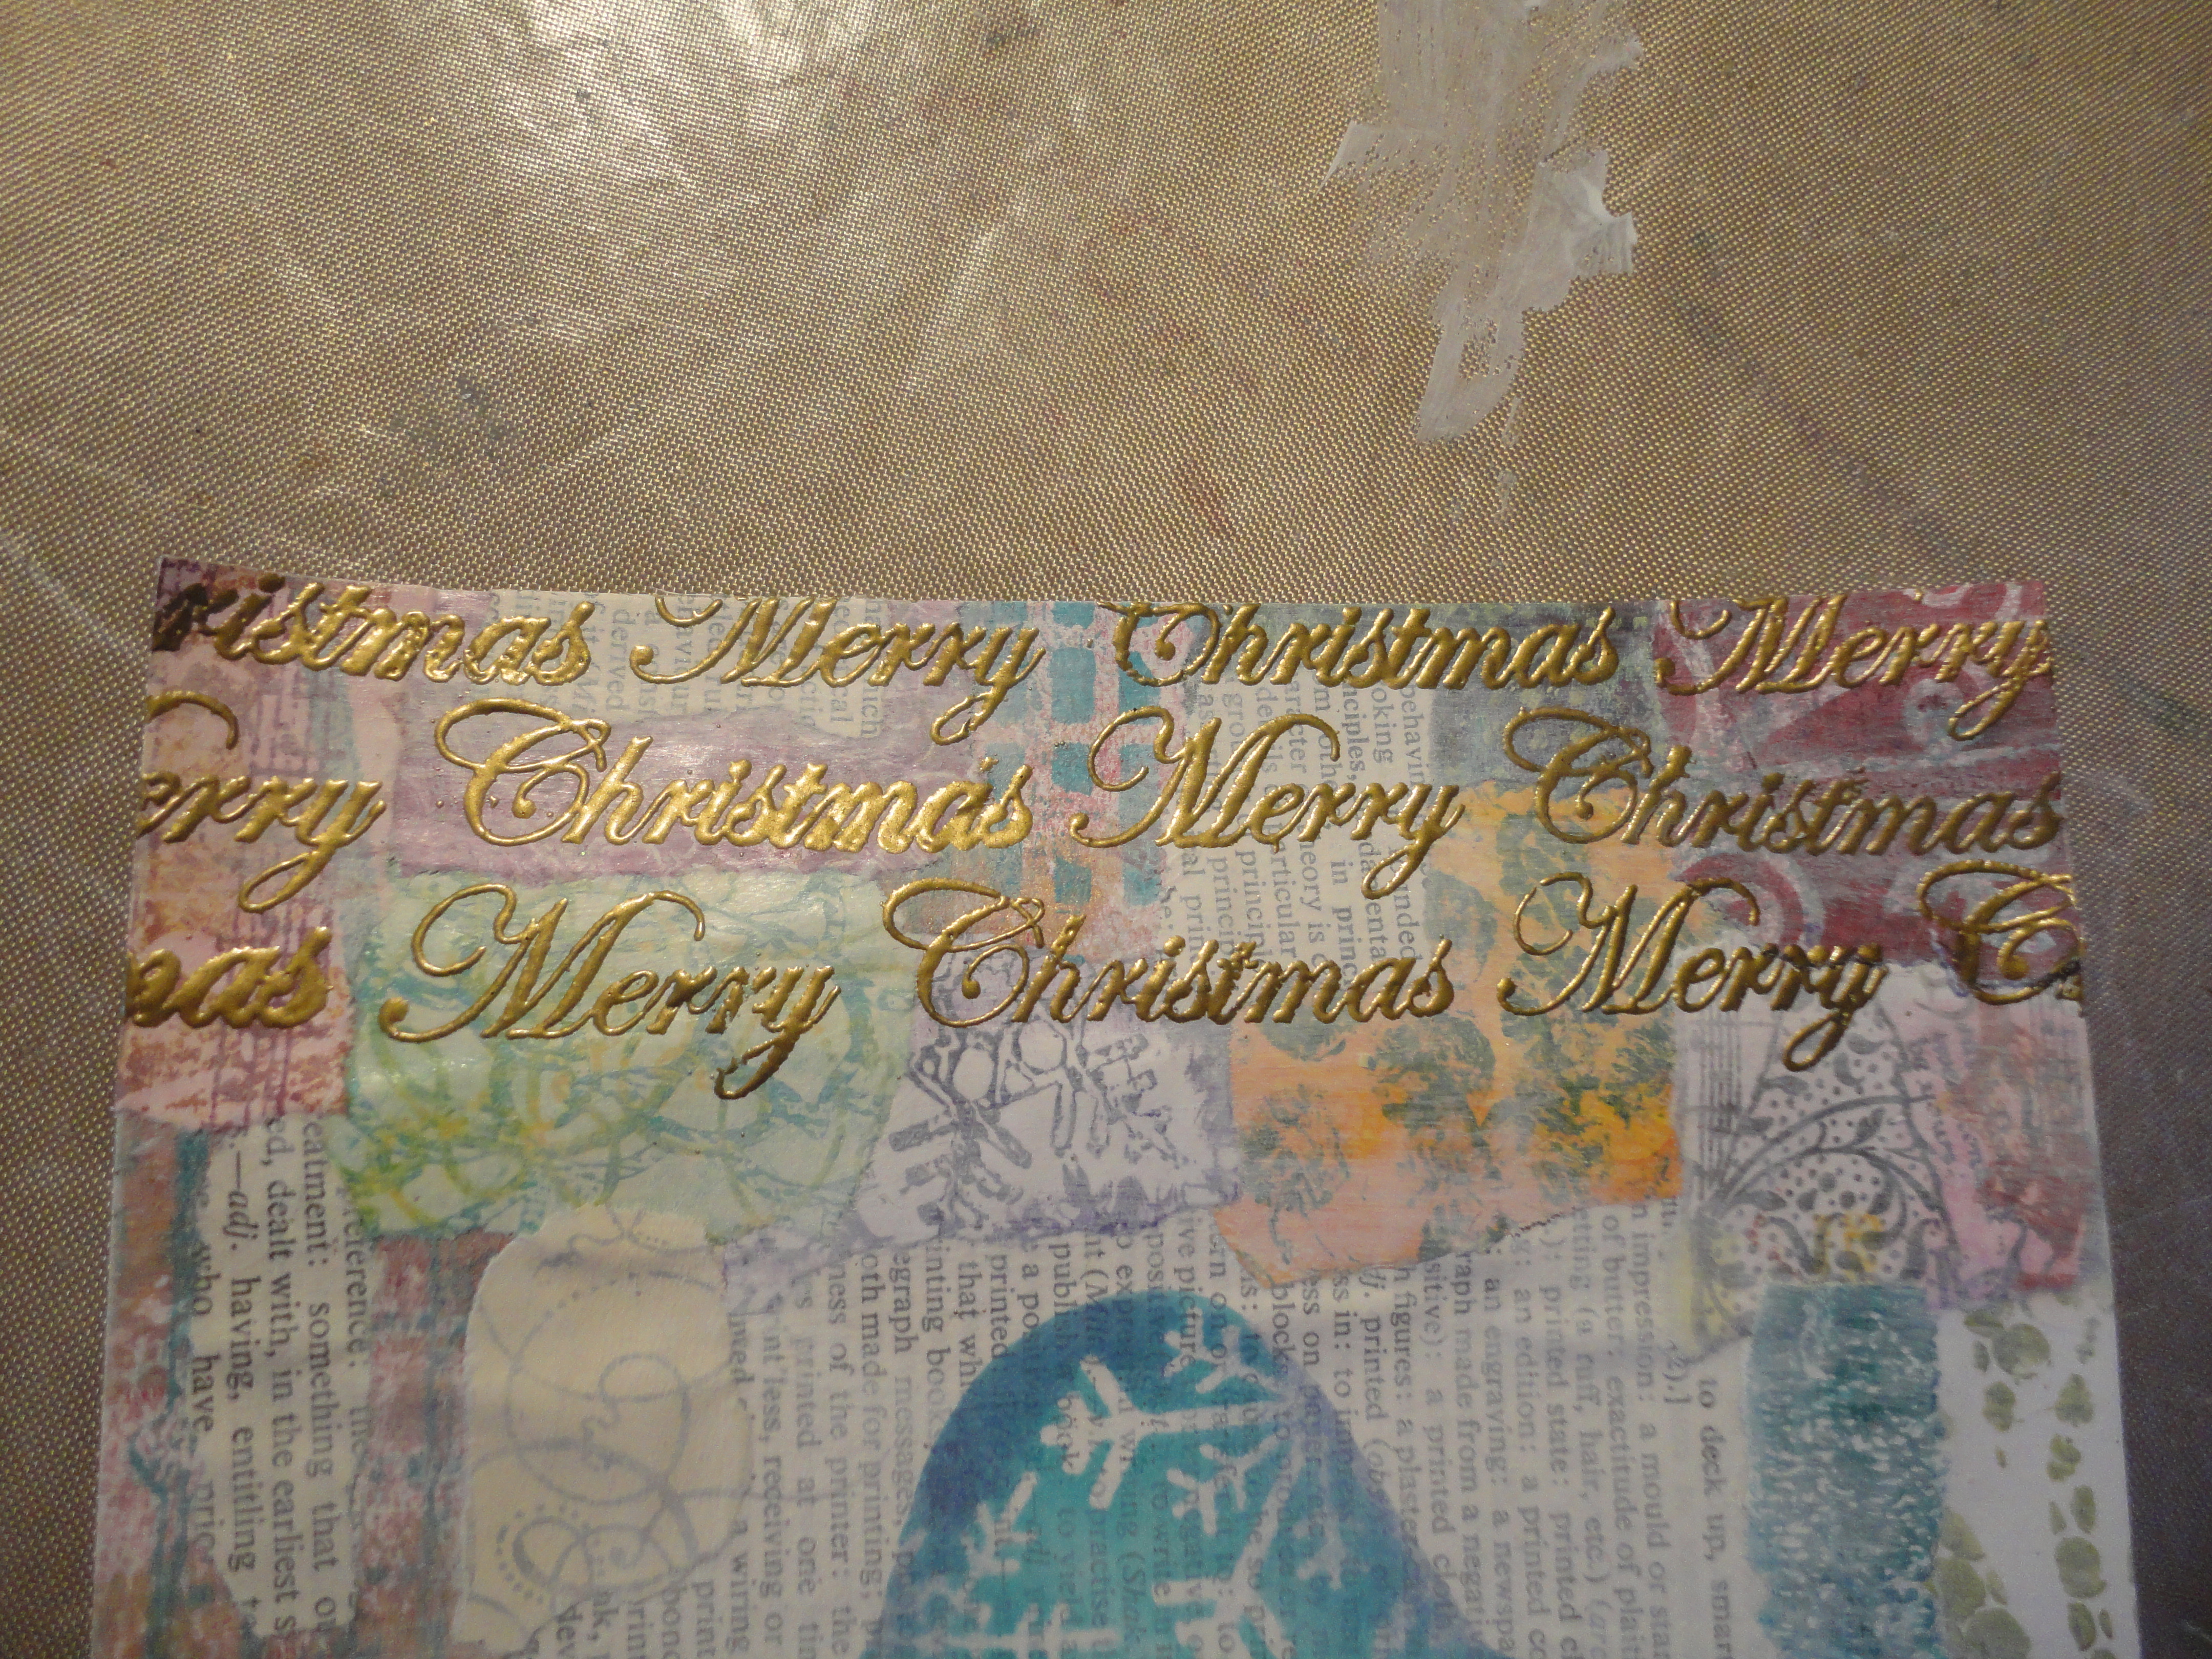
For my sentiment and to balance the left, I repeat stamped "Merry Christmas" with versamark and heat embossed in gold. Sounds easy - but I had issues with dirty stamps that didn't stick to the block and mis-stamped, so I had to gesso again and restamp. Just one of those times that everything that can go wrong did!


To finish it off, I sponged peacock feathers around the edge, and swiped black ink on the very edge. I added white ink behind the embossing to help it stand out, and then black. I also added some black swirls (from the same stamp set as the sentiment) around the outside.


I can't say this card exactly flowed! And didn't end up as I'd envisaged. Nevertheless I like the final product.


To join in with this technique challenge, pop over to the 52CCT blog. You have until Friday 2nd September to enter your Christmas card.