Saturday, 18 February 2017
Starburst
It's our first technique challenge of the year at the Christmas Card Throwdown.
I had to go and look this one up and check with my design team colleagues - not one I'd heard of before. But having watched a few youtube videos (this one in particular inspired this card) and had a play, I'm completely won over. It looks great, and is a good way to use up design papers.
So, I started by going through my stash to find some coordinating designs. It's a little disconcerting, as there are papers that I have no recollection of buying! I came up with a selection of grey-green papers. I also ran some cream pearlescent card through a few embossing folders, to add into the mix.
Once I had my selection, I cut strips roughly 13cm by 5cm, then cut them diagonally to make triangles.
I went for the holly embossed pattern for this card.
I cut a piece of scrap paper to size (16.4cm by 11.3cm, to fit on a 5x7 card base) and covered it with thin adhesive backing. You can use glue, but I had this and I thought it might be neater and less messy.
Then it's a case of positioning the triangles around a central point. It goes really quickly.
Even at this stage I think it looks good! I trimmed off the excess, and cut a piece from it to fill the gap.
There is a lot of waste with this, although I've kept all the offcuts. For next week I'm hoping to try a different approach that avoids this - if it works!
So that's the starburst done. It's such a pleasing effect, and could be the base for so many other techniques and styles.
For now, as our whole household has been struck down with a horrible lurgy cold, simple is the name of the game.
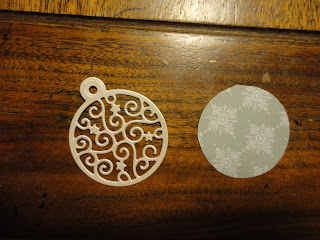
I cut a bauble die from the cream pearl card, and a backing piece from one of the patterned papers.
This will go over the centre of my burst, to hide the slight unevenness.
For a sentiment, I used a Clarity stamp. In the style I wanted my usual "Merry Christmas" is part of a larger stamp so needs masking, so I went with the stand alone "Christmas Greetings". I used watering can archival ink on the pearl card, and cut it into a banner.
I gave it a bit of a wave.
I cut some turquoise card as a mount, and attached with tape pen. For the bauble I used a zig glue pen to attached the die cut to the backing, them foam pads to lift it from the card. The sentiment then tucked under this, using glue dots to hold it in shape.
I so enjoyed making this, it's great to add such a lovely new technique to my repertoire.
If you would like to join in with the challenge, head over to the Christmas Card Throwdown. You have until Friday 3rd March to try this stunning technique.
Subscribe to:
Post Comments (Atom)


Oh wow! This is so pretty, so elegant. I do like the textured areas as well as the shimmery paper. Great take on the challenge! xxx
ReplyDeleteThank you Deborah. I think this technique has elegant built in, I'm really taken with it!
Deleteelle est tout en élégance Lucinda, très chic avec ces couleurs douces, biz
ReplyDeleteMerci Fabiola, j'aime ces couleurs dans ma maison aussi!
DeleteI love this soft palate of colors you choose. It is so elegant. Frankly, the card is perfect.
ReplyDeleteHa ha, thank you Ek. I could point out some imperfections! The colours did come together better than I could have hoped.
DeleteIt's a beautiful, beautiful card. Lovely soft colours.
ReplyDeleteI like the idea of using textured paper too and adhesive backing is definitly a good idea, I got in a right old mess with glue.
Hope you are all feeling a little better now.
Thanks Alison. The only issue with the adhesive backing is there's no wiggle time! But definitely less mess. We're all on the mend, not 100% yet but getting there.
Delete