The last challenge of the year at the 52 Christmas Card Throwdown is nice and open for those last minute cards (or the ones you don't want to enter until they've been received!)
As I have missed a fair few challenges with health issues, this is a chance to catch up on those ones I really wanted to do.
As my favourite colour is purple, I wanted to do the purple and white colour challenge from November.
I started with my gel press plate (the big 8x10 one) and acrylic paints - shades of purple, metallic white and titanium white.
I ended up with loads of backgrounds, but these are my favourites:
This used shades of purple, which I put my Clarity snowflake stencils over, and allowed it to dry while pressing star shaped punchinella into the paint. Once dry I lifted the stencils and used copy paper to lift the wet paint from under the stencils. I then brayered titanium white over and lifted the print. This was about my third print so there were remnants from the previous ones on the plate to add more interest and texture.
This one I added the metallic white paint first, then the stencils and brayerd purple over the top. I lifted the stencils, and stamped into the paint with Clarity snowflake stamps (they work well as they're so deep) and distress oxide inks in purple (I realised I have 5 purples - like I said, my favourite colour!)
This one was a bit of serendipity - it started as a very pale second print that hadn't really worked. But when I lifted the stencils from the previous print, covered in paint, I placed them on here and brayered over to transfer the paint. And I just love how this came out! Unexpected things like this from waste make me very happy.
So this was the first print I used for these cards.
I wasn't sure initially what to do with my lovely backgrounds, then I watched this video from Sam Crowe, and got my inspiration - very different backgrounds but the same layout.
I cut the print to make bases for two 5x7 card blanks (the print is just big enough to do this).
Using some of the waste, as well as the waste from the second print above after cutting a 6x6 base, I cut strips. I stamped on two of these in Gothic Purple stazon, using two very old sentiment stamps, and edged everything with the ink. I also die cut four snowflakes from the second print.
And put together with a lifting flap for movement - with snowflakes matched front and back so it looks good from both sides. This is where you realise your snowflake die isn't quite symmetrical - or the die cuts stretch unevenly while cutting or removing from the die.
This may be a well known card style but I'd never seen it before and really like the movement.
I'd like more contrast between the snowflake and strips on this one if I'm honest.
The paler strips I used here give more contrast, and the sentiment is clearer too.
And I still have lots of purple backgrounds to make more cards with!
To join in with the last 52CCT challenge of the year, head to the blog and enter your final cards.
Merry Christmas!
As we come into November, we have a sketch challenge at the 52 Christmas Card Throwdown.
I had this card planned out, as I've been away this week so had to plan what to take with me. But when I came to make it, I didn't like it at all! So I started again and made a quite simple card with what I had with me.
I made a background with distress oxides - I applied from the pad onto an acrylic block, spritzed, then stamped onto my card. I dried each layer (with my hairdryer as no heat gun with me!) before adding the next. The colours I used were faded jeans, wilted violet and peacock feathers.
I cut down to size (with a craft knife - I'm missing my guillotine too!) and sponged faded jeans around the edge.
I had precut a load of diecuts from black and white to use on the card, and fortunately had a lot left over from the aborted card.
I pulled out the twirly trees, black sentiment and black and white open stars, along with a white strip.
And put it all together. Easy! Although I did try a few combinations, with black strips, or a blue one, or the white sentiment...
So
I have ended up making another smooshing card, combining last week's
challenge with this one. I still think it makes very pretty backgrounds.
If I'd been at home I'd have made the strip across more delicate I think - I maybe could have used several very narrow strips instead of one wide one, but didn't think of it until too late!
To play along with our sketch challenge, click through to the 52CCT blog. You have until Friday 8th November to enter. Happy crafting!
There was no way I would miss this week's 52 Christmas Card Throwdown technique challenge - Smooshing!
I love this technique, so easy yet looks so amazing (I think!). The randomness of not being able to control exactly what you get appeals to me, especially when it's amazing!
This time, I wanted to put a slightly different spin on it, so I started by gessoing through stencils onto my card. This creates a resist, but it's matt and more subtle than something like clear embossing.
I made four backgrounds, well in advance, and thought I was well ahead of myself! I even managed to add the smooshed ink (distress inks) to them all. But making them into cards - well, only one got done in time, the rest will follow!
My favourite was actually my least favourite at the gesso stage. It uses the Clarity birch trees stencil, and I didn't think it was very clear. So I inked this first as a trial run - I used brushed corduroy, crushed olive and pine needles. And absolutely loved how it came out! Funny how with crafting things can reverse so quickly and surprise you.
To convert my background into a card, I dragged my frayed burlap distress oxide over a spare scrap of card, then die cut my reindeer (Tattered Lace) and sentiment. I cut the background down, edged in the same frayed burlap, added the die cuts and mounted on a 6x6 card blank.
If I'd had more time, I might have added a drop shadow around the die cuts for depth - and I still might. But I love the light in this card, it's like the sun shining through the branches.
To join in this week, head over to the 52CCT blog. The challenge closes on Friday 1st November.
I'm back with this week's 52 Christmas Card Throwdown card.
Branka has chosen "Snowmen" for her theme.
I had this planned out all week, but ended up making it at the last minute so it's actually a pretty quick one.
I started by die cutting three ovals from my card, and stamping the figures (Clarity wee folk stamps), then using a sponge and torn paper to add hills and ground them.
The snowman is a bit wonky - I might redo him before giving it to anyone!
On the background, I stamped the red band across the middle, then ran it through a Tattered Lace embossing folder, with just the top inside. I sponged a bit of the blue ink over the dots.
For the bottom half, I used second and third generation ink and three more stamps from the same Clarity knitted stamp set as the red border.
I then used green and blue to edge the card and the oval apertures, and put together onto an 5x7 card blank.
I think the bottom half of this turned out really pretty! And I like the contrast between the areas.
To join in this week, head to 52CCT. You have until Friday 25th to play.
I think the colour challenges at the 52 Christmas Card Throwdown are my favourites!
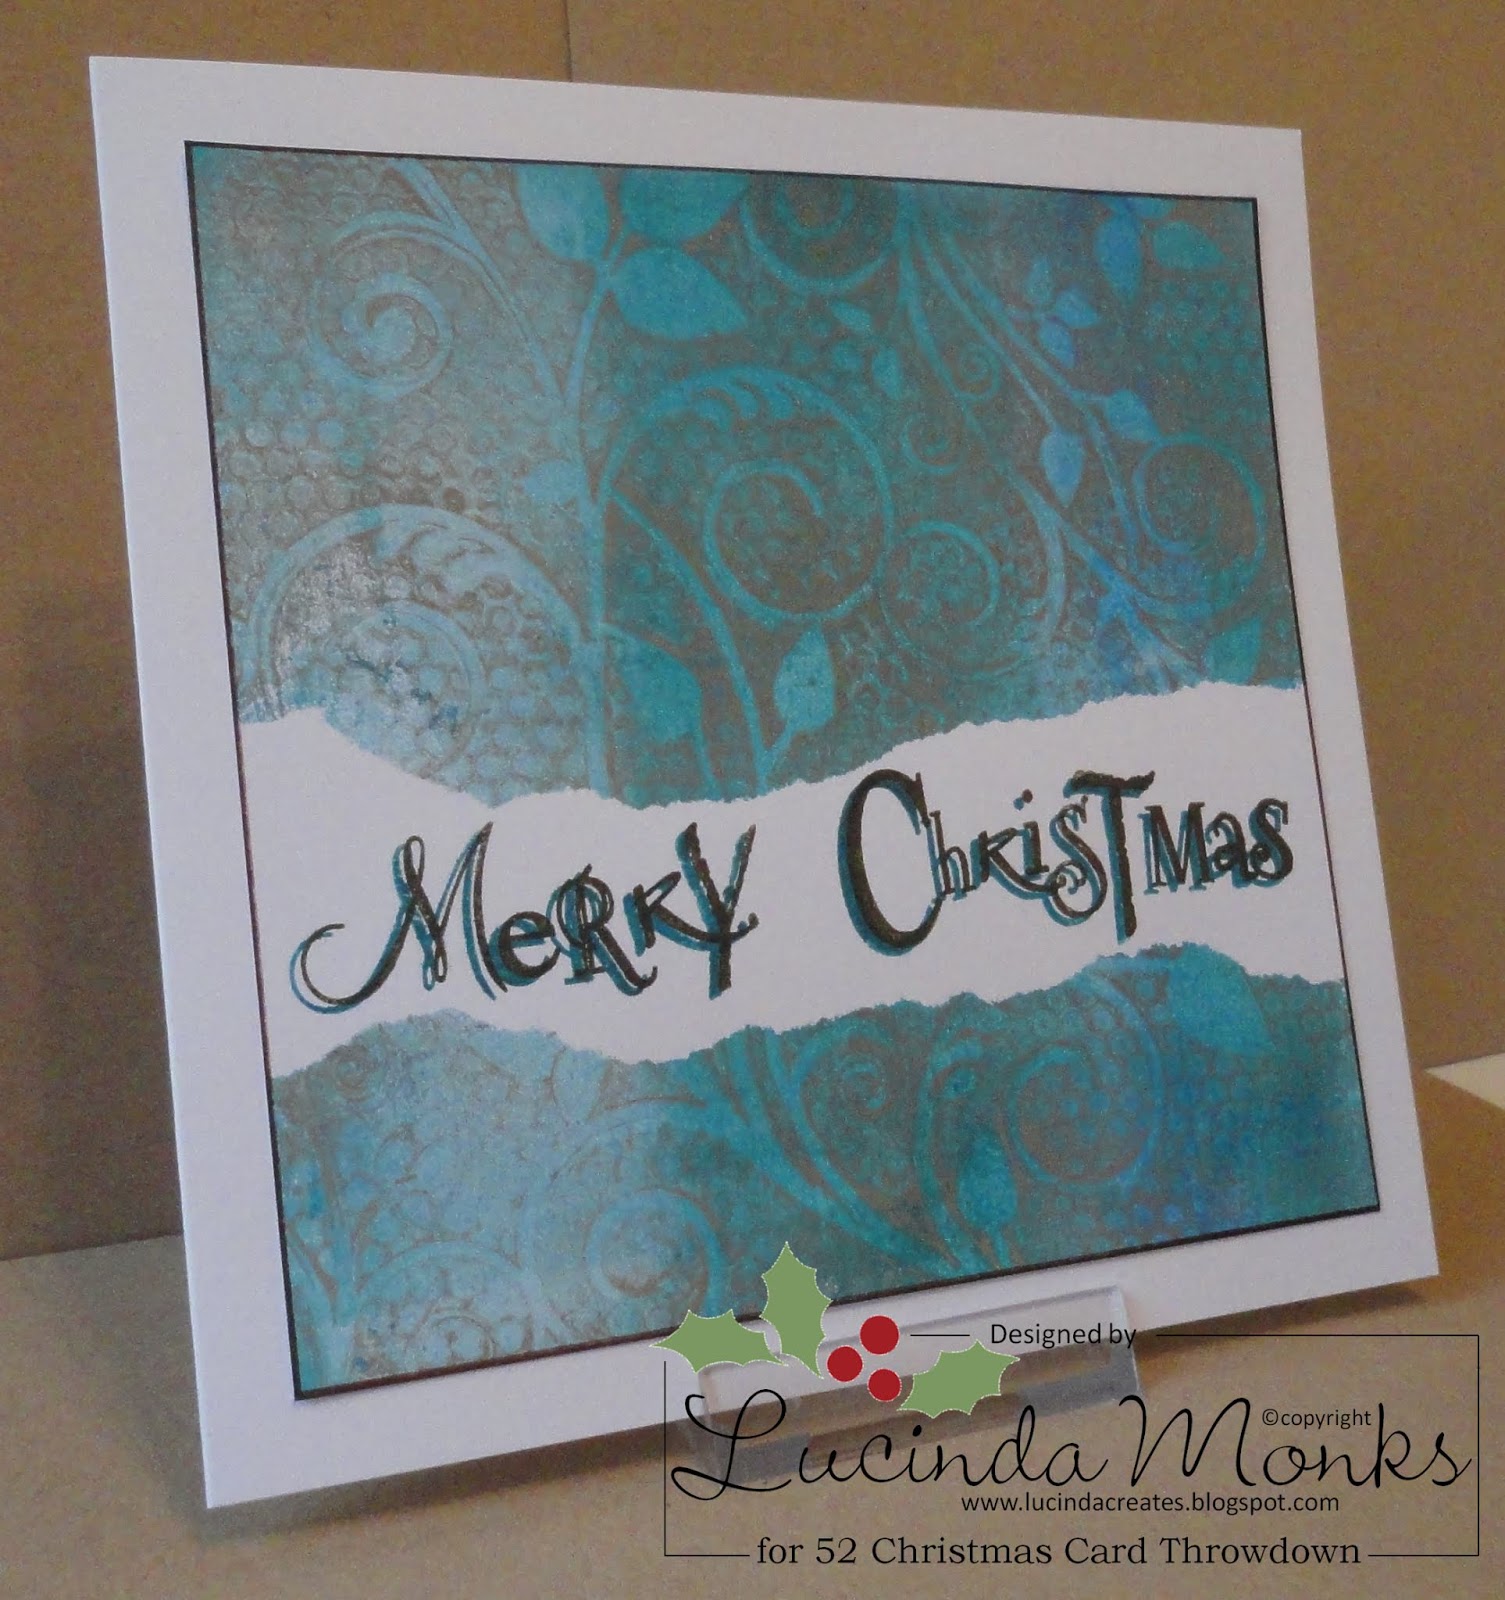
This week, Branka has chosen white, blue and brown.
This is such a classy combination - I wanted to try a shaving foam background as well, but first I played with my new 6x6 gel press plate again. (And didn't get to the shaving foam in time!)
This is a card design from Barbara Gray at Clarity, I claim absolutely no originality. There's a ClarityStamp video on Youtube that's basically this card - but a bit more complex I think!
So no step by step photos from me this week, just the cards I made. The base layer is a mix of browns, a bit of cream in the smaller ones, and a touch of gold to add shimmer. For the second layer, to lift it all off the plate, I used a mix of blues, including a metallic.
I stamped the sentiment with teale archival ink, and spiced chai stazon. I used the stamping platform to offset it slightly.
I also have a few backgrounds that didn't work out - I tried swapping the colours round but it was a bit dull - I think I'll try doodling in gold on it. Another one, the stencil slipped on the plate; not sure if there's anything I can do with that one, although it might die cut well.
This and the next one I cut down, edged with brown sharpie, and mounted on a 7x7 card blank.
I cut down the first one as there was a blob of paint of the edge, but liked it so did this one too.
This one I left with the natural shape from the gel plate. I didn't cut down (7x7 stencil card from Clarity), but edged with the brown sharpie and mounted on an 8x8 card blank. I find this a bit too big!
To join in with our colour challenge, head to the 52CCT blog. You have until Friday 18th October to join in.
Have fun crafting!
Hurrah, a card on time for the 52 Christmas Card Throwdown - although it was close!
Branka is our host for October. This is the sketch she's chosen for us.
I got myself a new gel press plate last week, a 6x6, so had to have a play with it. I used acrylic paints, and stamps to lift the paint off.
I only got to make a card from one of these this week, I'm sure the others will get used before long.
Not a lot of photos this week.
After cutting to size, I placed a circle stencil over the edge of the card, then a leafy swirl (from Clarity) over that. I spread champagne modelling creme through the stencils.
Once dry, I sponged red then black permanent ink round the edge of the card. I put the circle stencil inner over the area I'd applied the modelling creme, and sponged ink out from it to form a shadow. I used dark red, and a little brown over the red paint for more contrast.
I die cut "Merry Christmas" from black card. I used the negative as a stencil over the card to apply more of the modelling creme.
This worked better than expected - I thought it would spread under the card to give a more diffuse background. I bet if I wanted to be readable it would spread!
I then attached the black sentiment over the creme to form a highlight.
I had moments while making this that I wondered where it was going, but I really like the finished result. The detail in the gel plate background really comes through for some gorgeous interest.
To join in, pop over and visit the 52CCT blog, for loads more inspiration from my DT colleagues. The challenge is open until Friday 11th October for you to play. You'll see that we're also looking for new members to join our lovely design team, could that be you?
Ridiculously late with my 52 Christmas Card Throwdown DT card this week - but I'd started and really liked what I'd done, so was determined to finish it off!
Myrna has chosen "Easel or Tri-fold" for her technique challenge.
A super speedy run through the "how to":
Sponge antique linen distress oxide over an A4 sheet of Sheena's stamping card.
Sponge gesso through two stencils - Clarity's brick and holly.
Put another Clarity stencil (don't know the name!) and sponge through with fired brick and mowed lawn distress ink, watered down. The gesso acts as a resist.
Cut to size (13.2 cm square) - two pieces for an easel card.
Stamp in versamark with a music stamp and a holly one. Brush bronze mica powder over.
Edge with vintage photo distress oxide and mount on charcoal card.
Grab the "NOEL" I stamped for the black and white challenge, cut down, edge and mount in the same way. Add to one of the pieces.
For the stand, take an offcut of the background, stamp the sentiment (from Clarity again) in versamark and add the mica. Add holly around the edge. Edge and mount as above.
Put it all together onto a 6x6 card blank, folded to make the easel.
I love this background, and the layers within it. So pretty and Christmassy.
To join in, head over to the 52CCT blog. Only a few days left - you have until Friday 4th October to play.
Despite my efforts yesterday, I didn't quite get my theme card for the 52 Christmas Card Throwdown finished and posted in time for the launch. But better late than never.
Myrna has chosen "bears" for us to play with this week.
It took me a while to figure out this one, as I don't usually do characters. I did buy a Forever Friends stamp set at a sale a while ago, but the images were too custsy for me (it was 50p so don't mind!) Then I remembered I had a polar bear die, and eventually came up with something to do with it.
I started by cutting card to size and embossing with an Embossalicious snowflake folder.
Then I put it back through the mangle as I didn't want it too raised - seems backwards but I had a plan!
Next some die cutting from the card I'd cut away - as well as the polar bears, I cut some Merry Christmas sentiments.
I then added the bears to my background, glued on and put through the die machine again, so they're into the background like an emboss. This is why I flattened the background, so they'd stick flat onto it.
I then tore away the edge of the card.
Colour next - broken china and faded jeans distress oxides, blended over. The snowflakes pick up the ink depsite the flattening, giving more interest.
Next some gilding was in bronze, trying to pick up the edges of the bears.
I played with this a lot more - dry brushing white gesso over to lighten it, and splattering with watered down gesso.
I ended up painting the bears with the gesso and a water brush, so it wasn't solid, but made them stand out more. And adding a black soot drop shadow. Given that they're the theme of the card, they were getting a bit too subtle!
For the other half of the card, I used the remains of the cut away card. I started by stamping in distress oxide, using an IndigoBlu script stamp.
I then over stamped with a funky snowflake stamp I bought months ago and re-found the other day, in versamark and heat embossed with clear powder. Hard to photograph but I had a go!
I then did a wash over in a very pale blue, so the embossing would resist. I misjudged it a bit though, it ended up darker than I wanted. I tried to bleach it out with water but not much lifted. So I was wishing I'd used a different type of card!
I then joined the two pieces together.
I coloured some of the sentiment die cuts with the same distress oxides, and some picket fence white distress ink, and added them to the bottom. I saw a Clarity YouTube with Sam Crowe the other day, she was talking about repeat stamping sentiments so I decided to try the same here but with die cuts. The white stands out as a bit of a focus, the others drop into the background more.
Finally I edged with faded jeans and black soot, and mounted onto a 6x6 card blank.
This didn't quite turn out as I'd planned! But then, they rarely do. Lots of fun inky and embossing techniques in here.
To join in with your take a "Bears", visit us at the 52CCT and share your card. Entries close on Friday 27th September.